This week’s Sizzling Science theme for fifth and sixth graders at the Burlingame Library was Fun with Electronics. For this one, I stole an idea from the Maker Faire in San Mateo, as well as a project recommended by my coworker, Carbelle Imperial. The first was a popsicle stick flashlight, and the second a Brush Bot. This was by far the most expensive workshop I’ve done so far, since I bought the Brush Bot kits from the Maker Shed (a pack of 12 costs $34.99, and I needed 2 packs).
I started out by talking to the kids about electronics, asking them where the word comes from, and discussing what electrons are (one of the three parts of an atom, and the one that carries a negative charge). I brought out a AA battery, and pointed out the positive and negative terminals. I explained that a chemical reaction inside the battery causes electrons to build up at the negative end. The electrons want to travel to the positive end, but cannot travel through the battery itself because of a substance inside called a separator. (I passed around this diagram from Online Digital Education Connection to illustrate the different parts of the battery.) I pulled out a piece of aluminum foil and used it to connect the two battery terminals, then walked around to let the kids feel how hot the foil had become, using it as an illustration of a very basic circuit.
It was clear that three or four of the kids already had a great deal of background knowledge of electronics, and were quick to answer questions. Most of the group stayed quiet though, so it was hard to gauge how much they knew.
I told the kids that they would be using a simple circuit to make a flashlight, and asked them what parts they thought they would need (some of them had already sneaked a peek at my model when they came in the door, so they knew a lot of the answers). The parts were: a 5mm white LED, a 3-volt lithium coin battery, 1/2″ copper foil tape (which I had pre-cut), jumbo-sized popsicle sticks, small binder clips, and Scotch tape. We talked a little bit about the function of each part, and I pointed out that the LED had a long leg (the positive lead), and a short one (the negative lead).
In retrospect, I should have handed out each part a step at a time. As it was, I handed out all the materials at once, and a number of the kids jumped right in without waiting for instructions. That left me with a lot of troubleshooting to do, and several of them had to start over. On the other hand, making mistakes and then correcting them may have taught them more than blindly following the steps, so I guess it worked out.
Anyway, the basic process is this:
1) Run a strip of copper foil down one side of the popsicle stick. Make a small roll of foil at the end, leaving sticky spot close to the center of the stick.
2) Attach the battery to the sticky roll of foil. The positive (+) side of the battery should be down, touching the foil. (This was one of the most common mistakes).
3) Clip the binder clip on the end of the popsicle stick closest to the battery. Flip the metal leg of the clip down. It should rest on top of the battery. If it doesn’t reach, adjust the foil and battery to move the battery closer.
4) Flip the popsicle stick over, and run the second strip of copper foil down that side. Again, when you flip the metal leg of the binder clip down, it should rest on the foil.
5) Place the LED on the end of the popsicle stick opposite the binder clip, with the long leg (positive lead) straddling the side with the battery. Both legs should be touching the foil tape on each side of the popsicle stick. If both legs of the binder clip are down, the LED should light up. If it’s working, tape the legs of the LED down with the Scotch tape.
6) Now you have a simple flashlight with a switch. To turn it off, flip the top leg of the binder clip back away from the battery.

A completed popsicle stick flashlight
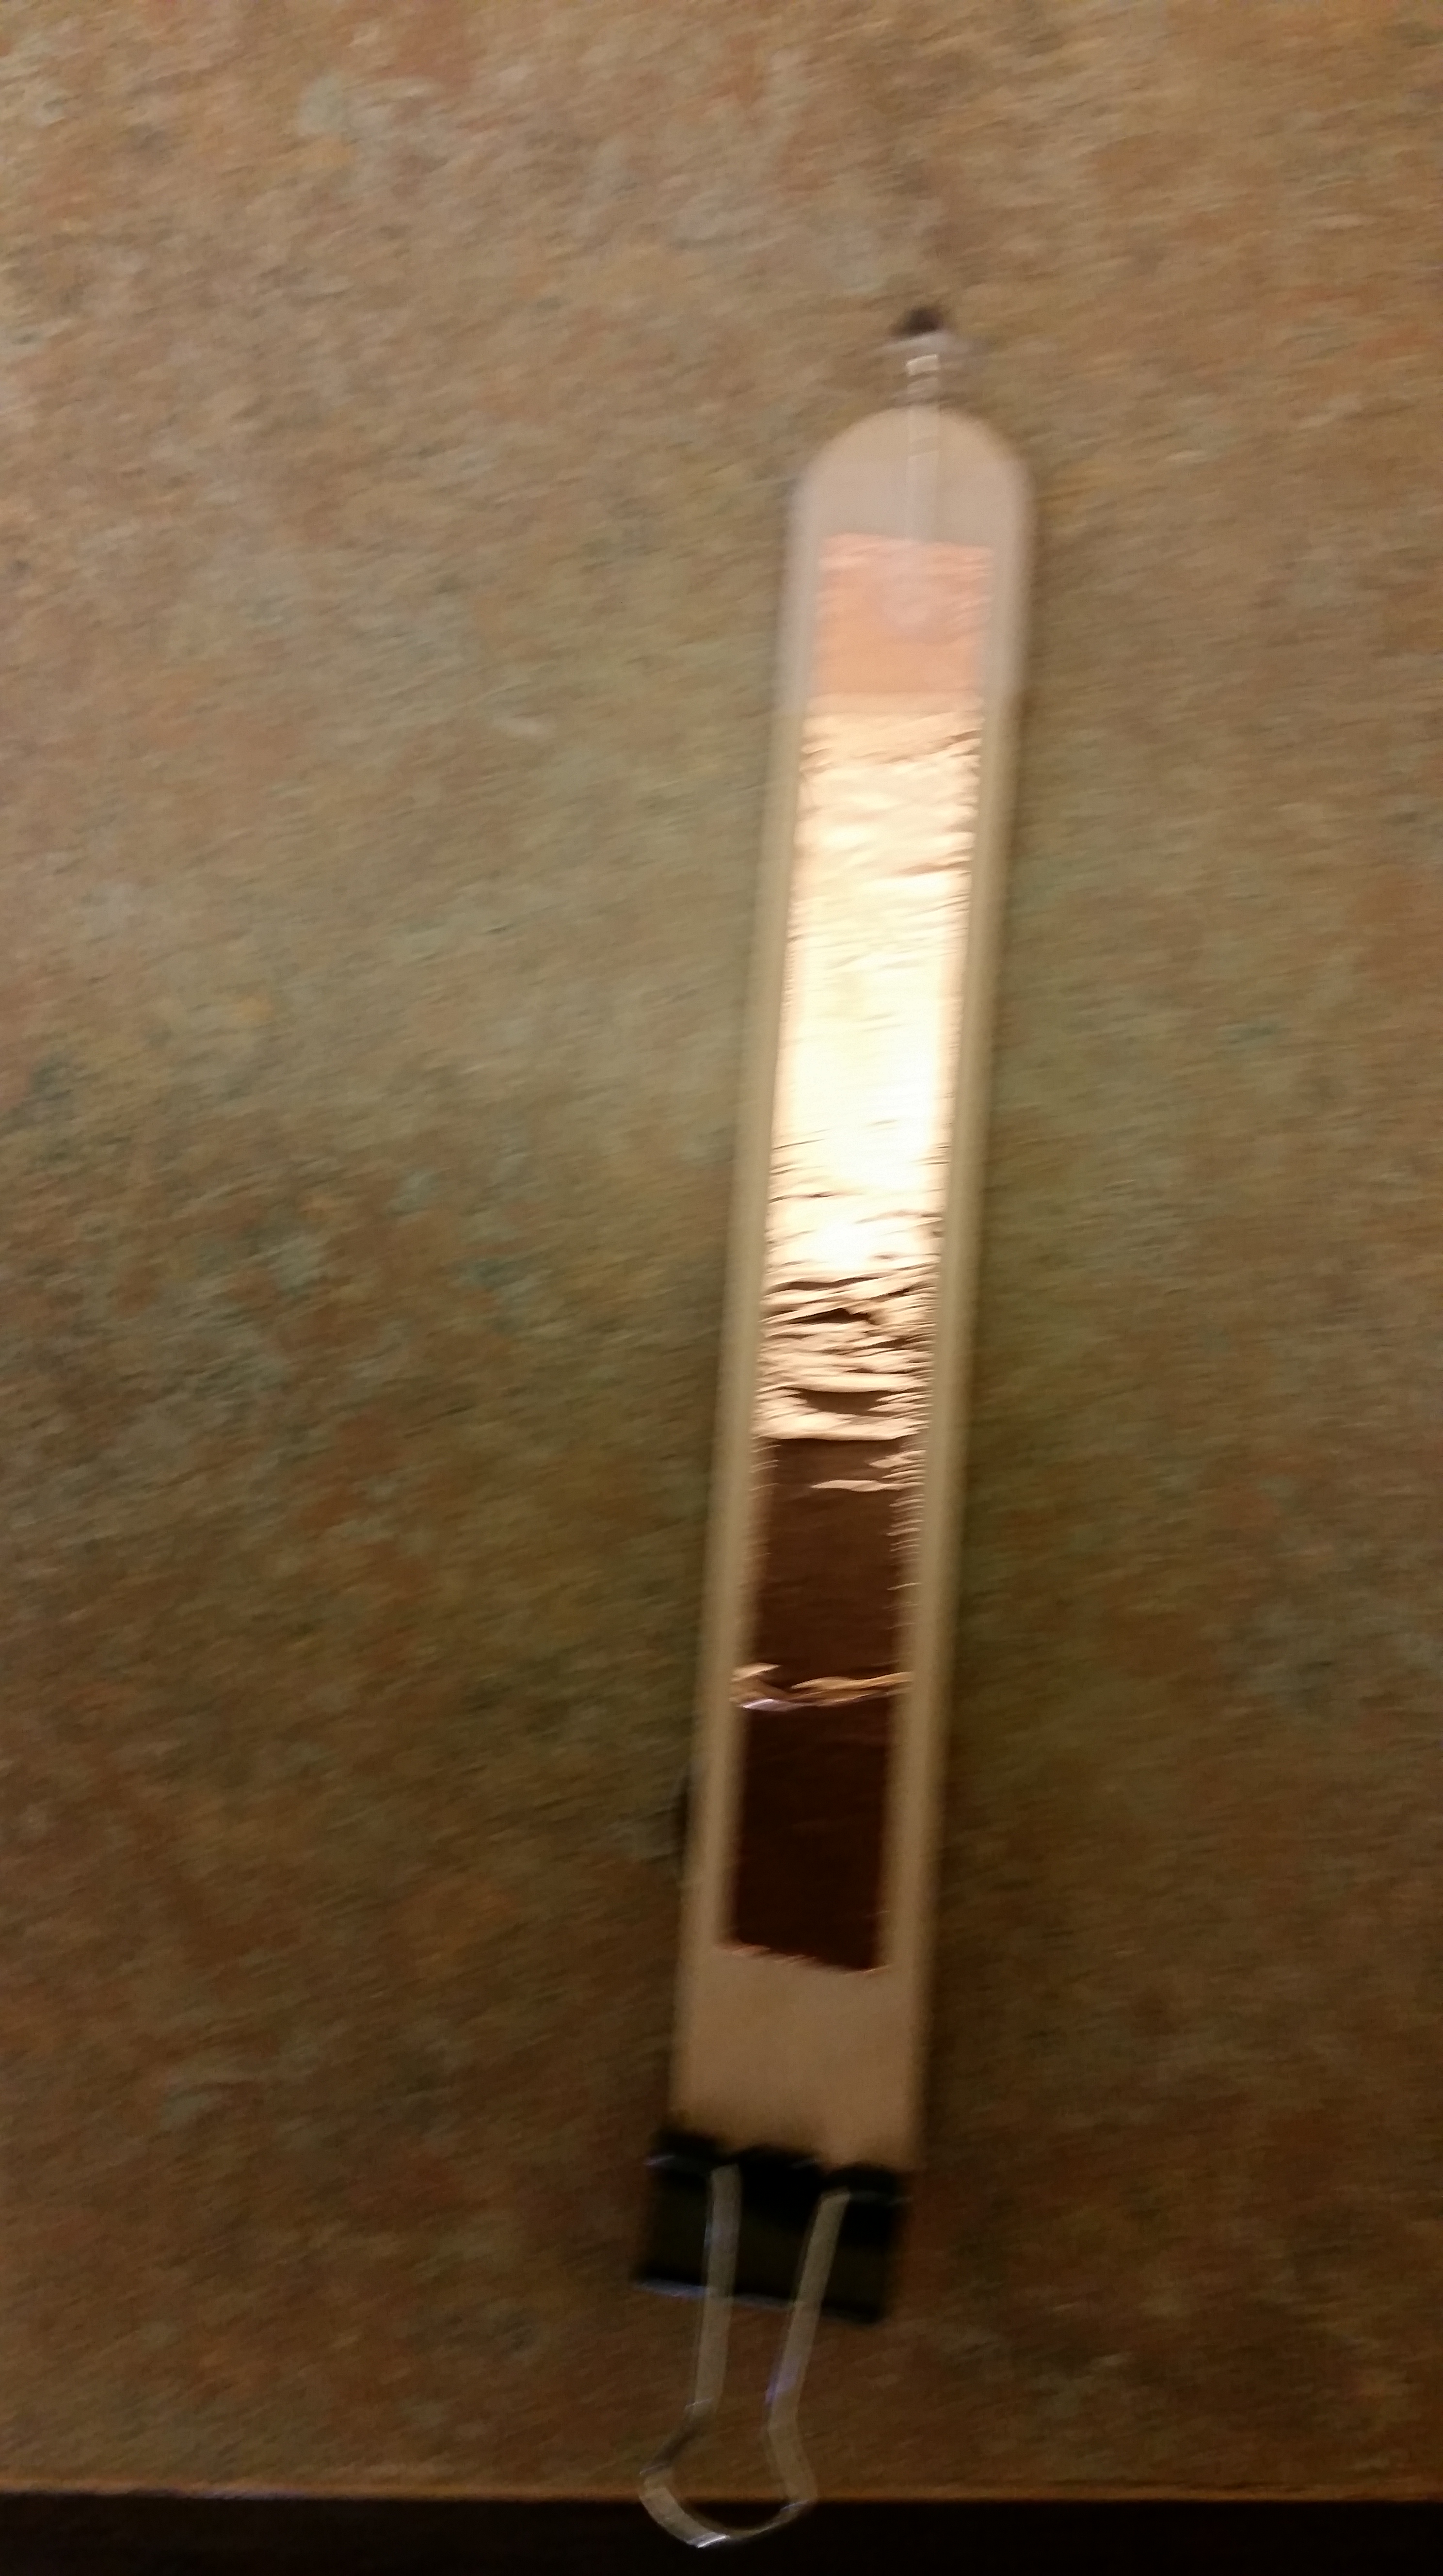
The bottom side of the popsicle flashlight
Some common problems the kids ran into were: putting the LED on backwards (with the short leg on the battery-side of the popsicle stick instead of the long one); running the copper tape over the end of the popsicle stick (in those cases, I just tore the foil, so it was no longer connected); putting the battery on upside down (with the positive side facing up; and putting the battery too close or too far away from the binder clip (sometimes the kids had the hold the binder clip down against the battery to keep the light from flickering). Incidentally, you could make the flashlight with the positive side of the battery facing up, as long as the LED was also attached the opposite way, with the long leg facing the battery-side of the popsicle stick.
I did this project with the kids all sitting in a circle on the floor, to make it easier to distribute supplies and handle questions. The funny thing was that this project was intended to be a more defined, step-by-step activity, but by now the kids were so used to coming up with their own ideas and prototypes, that many of them went off to tinker with the design, and add extra LEDs (one boy had five!).

A flashlight with 5 LED’s
Once everyone had a working flashlight, I asked them to move to the tables, and brought out the Brush Bot project. This one was much more straightforward. It’s basically a tiny robot made from the head of a toothbrush, a vibrating micro pager motor (the thing that makes cell phones vibrate) with adhesive on one side, and a coin battery. The coin battery is encased in a plastic cover with two wires coming out. I had cut the heads off the toothbrushes ahead of time, cut the adhesive tape included with the kit into small pieces, and trimmed the wires, stripping the plastic back to leave a 1/4″ of copper.
All the kids had to do was stick the motor on top of the battery, use a piece of adhesive to stick the battery onto the toothbrush, and twist the ends of each of the wires from the motor around the ends of one of the battery wires (it doesn’t matter which one). If it works, the motor vibrates, and the brush twirls around (the battery and motor will also move around without the toothbrush, so it might be fun to experiment with that or with other types of bases). The kit comes with stickers for the kids to decorate their robots.

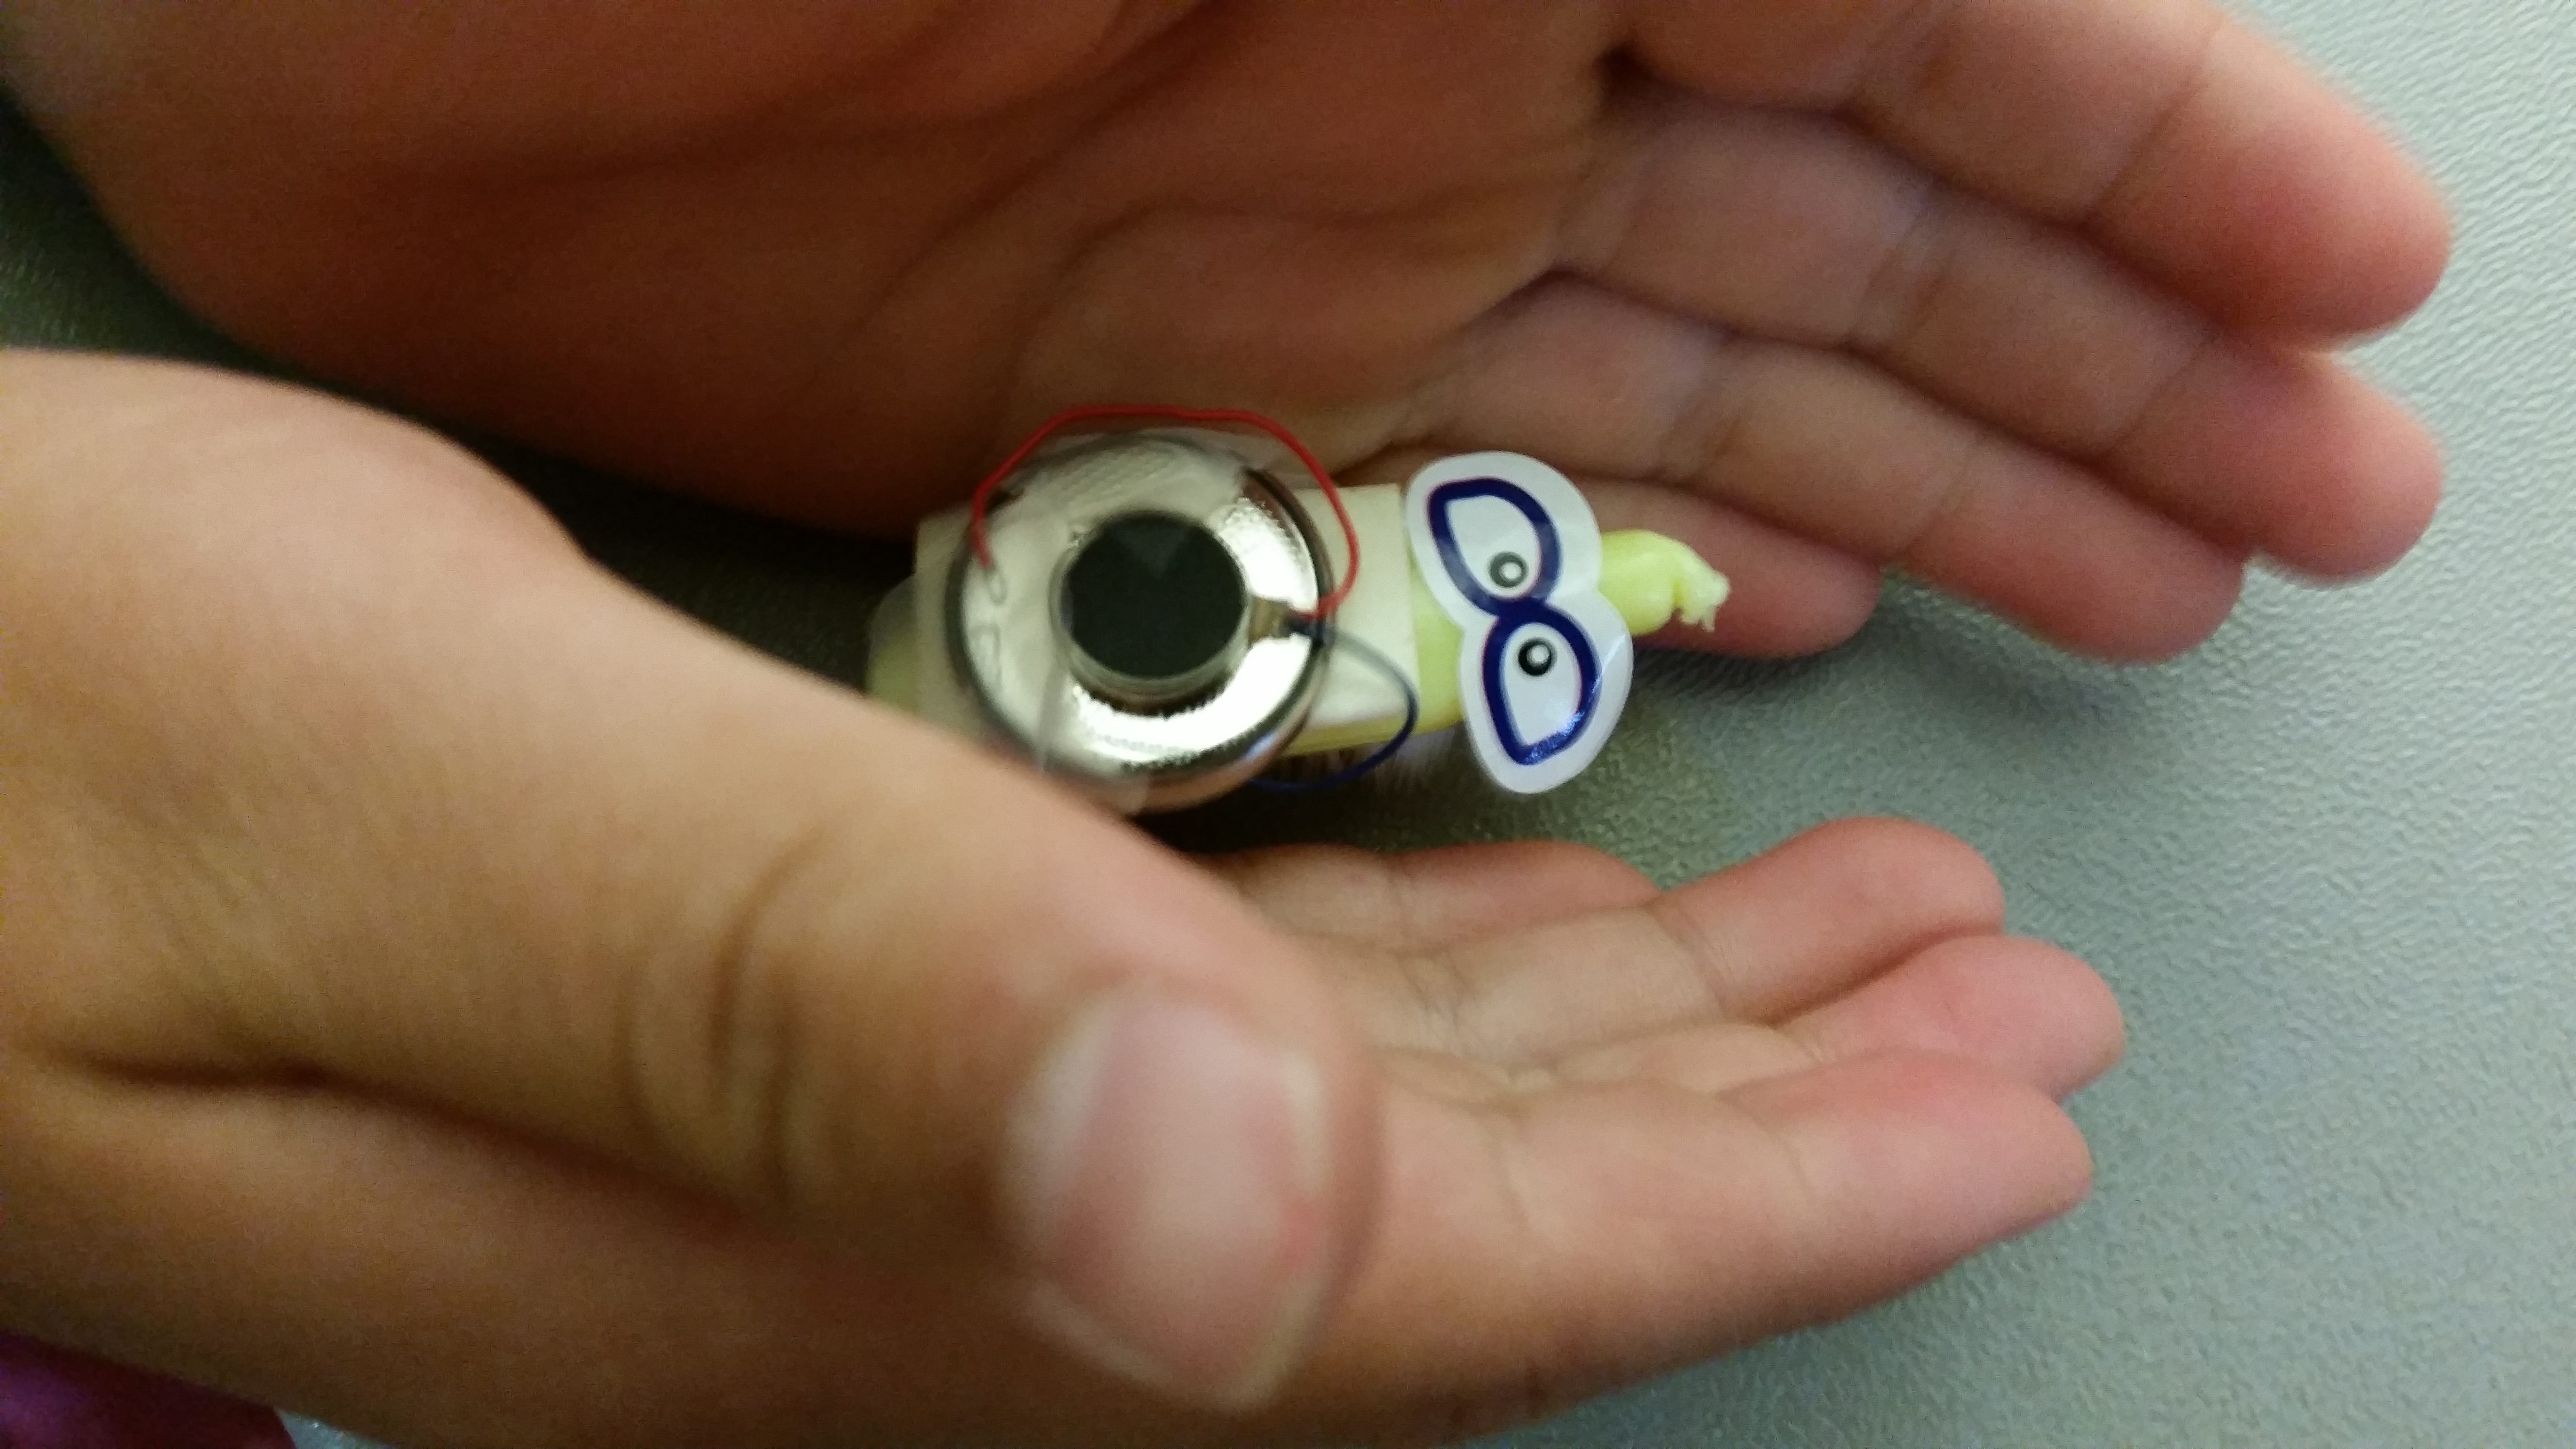
A brushbot decorated with pipe cleaners. The small black circle on the top is the vibrating motor. The yellow disc beneath it is the battery. It is attached to the toothbrush with an adhesive strip.
I had to do a fair amount of troubleshooting with this project too. The biggest, and most frustrating, problem was that some of the batteries didn’t seem to work. (I checked them over later, and found that they had lost some of their voltage. They could still light an LED, but were no longer strong enough for the motor. I did find a simple workaround though: I had a few coin batteries left over from the flashlight project, so I helped the kids use Scotch tape to attach one of the motor wires to the positive terminal of one of those batteries, and the other wire to the negative terminal. It worked just as well, and helped reinforce the idea of creating a circuit. In fact, I think if I could find a cheap source for the micro pager motors, it might be an easier and less expensive way to do this project.
A Brush Bot with the motor attached directly to the positive and negative terminals of a 3V coin battery
I gave the kids some pipe cleaners to add appendages to their robots. By this time, they were off creating all kinds of new designs. My favorite was a kid who attached a toothbrush head to his popsicle stick flashlight, and made a vibrating toothbrush with an on/off switch!
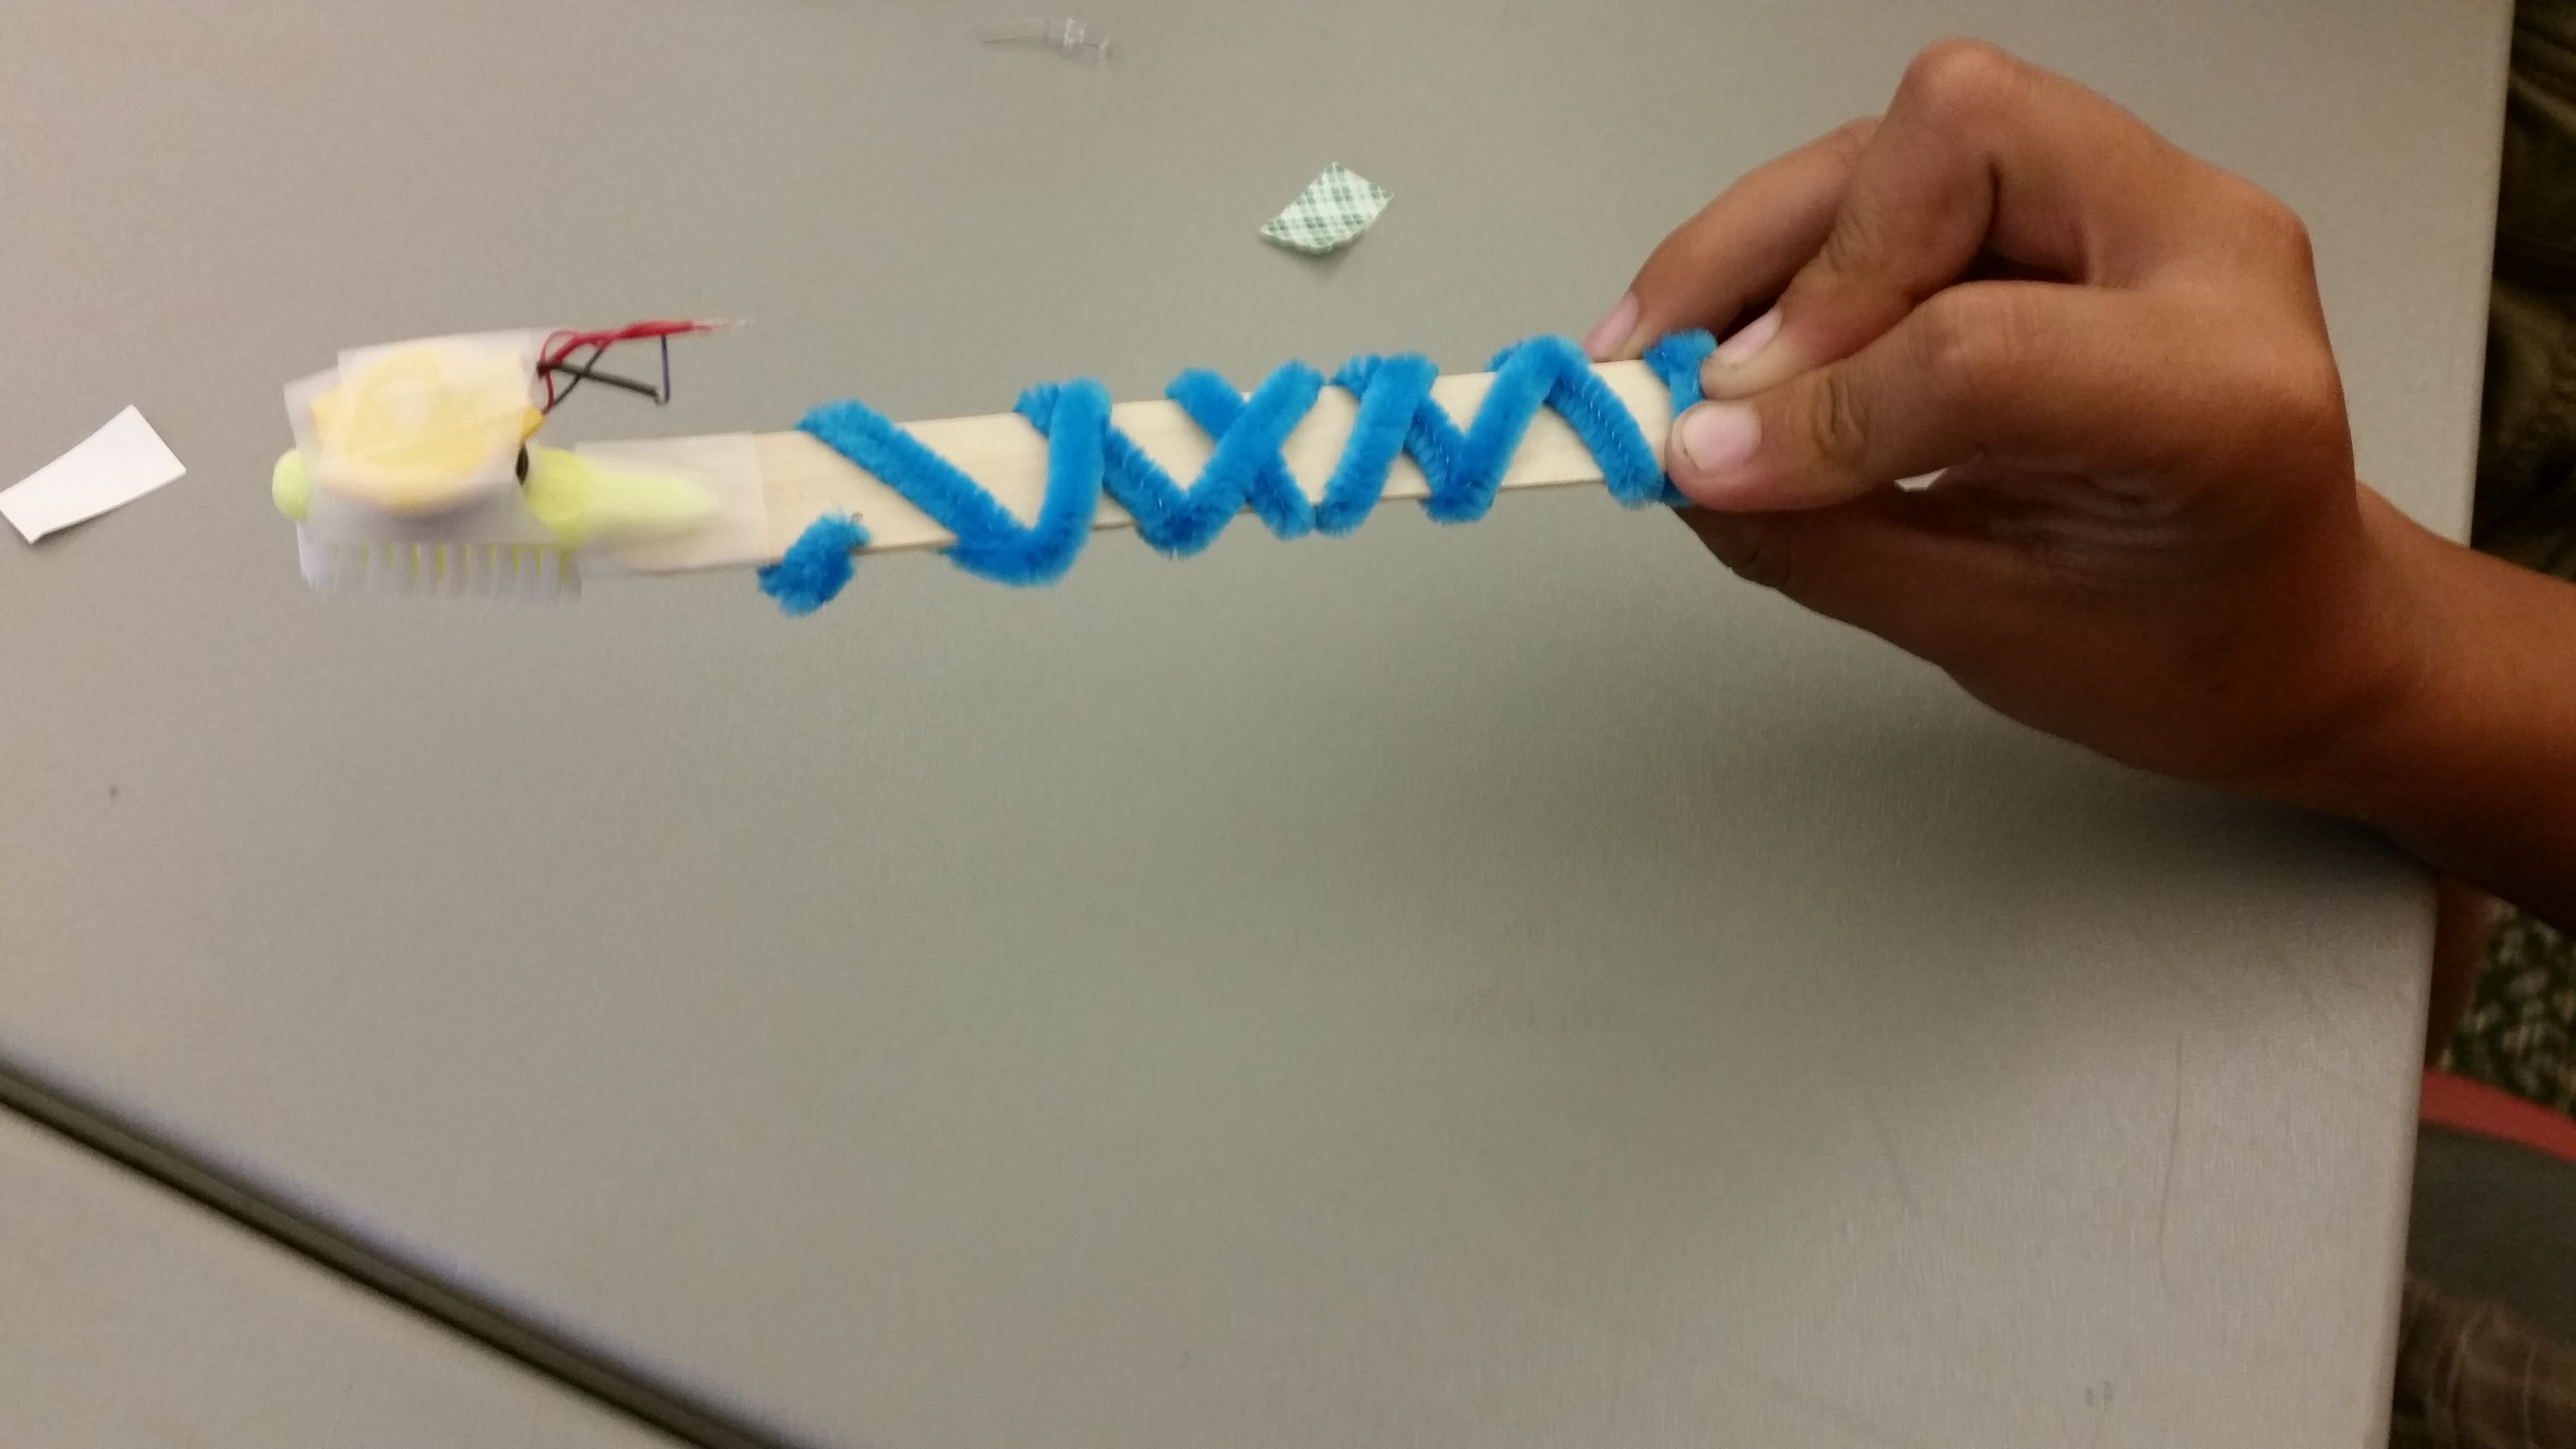
A vibrating toothbrush with on/off switch
I’m still amazed by the kids in these workshops. They have so much creativity and enthusiasm, and I’m almost sad to see this workshop series come to an end. Next week’s theme is Hot and Cold, so we are making ice cream in a bag and homemade thermometers. I’m just hoping it’s not too messy! Wish me luck!


